The importance of measuring coating thickness is discussed extensively in the “How to Measure Coating Thickness” article. When it comes to selecting a handheld portable coating thickness gauge, an incorrect instrument choice may result in a measurement failure (e.g., inability to obtain a value) or completely wrong results.
Even when a false reading is obtained with an incorrect gauge for the job, there’s also a high risk of assuming it’s accurate.
The above factors increase the chances of failing to meet a desirable coating thickness specification. The consequences may lead to the added costs of rework or lost contracts due to customer dissatisfaction.
This article explores the factors that influence choosing the most suitable gauge for a specific application, first time, and ensure the measurements are fully representable of the actual coating thickness.
Influencing Factors
When it comes to choosing a suitable coating thickness gauge, it’s essential to consider several crucial factors. Each one of them will determine what type of instrument and measurement probe are required.
The Physical State of a Coating
Initially, for coatings in a liquid state or the so-called ‘uncured state’, the traditional Dry Film Thickness (DFT) gauges won’t work. For such applications, non-contact powder coating thickness gauges are required. They function by placing the probe at a calibrated distance from a measured surface, and readings are obtained using the ultrasonic measurement principle.
This method is limited to powder coating applications, where a thickness needs to be predicted before the final curing stage. Once the depth is known, it’s possible to potentially reduce the powder consumption that leads to leaner coating application processes with financial and ecological advantages.
However, for coatings is their stable (cured) state, Dry Film Thickness (DFT) gauges are ideal instruments for these applications. They also test layers non-destructively and cover a significantly wide range of applications. In this instance, a measurement probe needs to be applied to a surface for a reading to take place.

This article guides a reader to choose the appropriate DFT gauge for measurements of coatings in their finished “cured” state.
Coating and Base Material
DFT Gauges work using either magnetic induction or eddy current measurement methods. The main difference between the techniques is that the first measures the coating thickness on Ferrous (Fe) while the latter on Non-Ferrous (NFe) substrates. Some gauges incorporate both principles in one to cover all possible base materials. The principle of operation can be seen in Figure 1 and Figure 2.

Figure 1. Schematic diagram of a probe incorporating magnetic induction method.

Figure 2. Schematic diagram of a probe incorporating eddy current amplitude sensitive method.
The magnetic induction measurement method works by generating a low-frequency magnetic field that is produced by excitation current I~. A measurement coil μmeasures the resulting magnetic field.
The Eddy current test method, (amplitude sensitive) measures according to ISO 2360 and ASTM 7091 standards. A coil wrapped around the ferrite core is induced with an excitation current. It generates a high-frequency magnetic field that sends loops of electrical current into a base material, in planes perpendicular to the magnetic field. The same coil measures the resulting magnetic field.
In both methods, the measurement coil sends a signal to the instrument (DFT gauge), which converts it into numerical units we can understand, such as microns or mils.
In case a coating has the same chemical composition as a substrate, there’s no way for a measurement probe to recognise the difference. Hence, it’s essential to understand what material a coating consists of and whether it’s measurable on a given substrate using a DFT gauge.
The table below demonstrates typical applications for both magnetic induction and eddy current methods. We also extensively talk about magnetic induction and eddy current measurement principles in the “How to Measure Coating Thickness” article.
| Measurement Principles and Their Main Applications | |||
|---|---|---|---|
| Magnetic Induction | Eddy Current | ||
| Substrate (Base Material) | Ferromagnetic (e.g., Steel or Iron) μm | Electrically conductive non-ferrous metal (e.g., Aluminium) | |
| The Main Field of Application | - Non-ferromagnetic coatings - Electroplated coatings made of chromium, zinc, copper or aluminium - Paint, enamel, varnish or plastic coatings | - Electrically non-conductive coatings - Paint, enamel, varnish or plastic coatings - Anodic coatings |
|
Helmut Fischer GmbH offers a wide range of DFT gauges with built-in or interchangeable probes that use magnetic induction and eddy current methods. Learn more about the instruments we suggest following the link below:
Coating Roughness
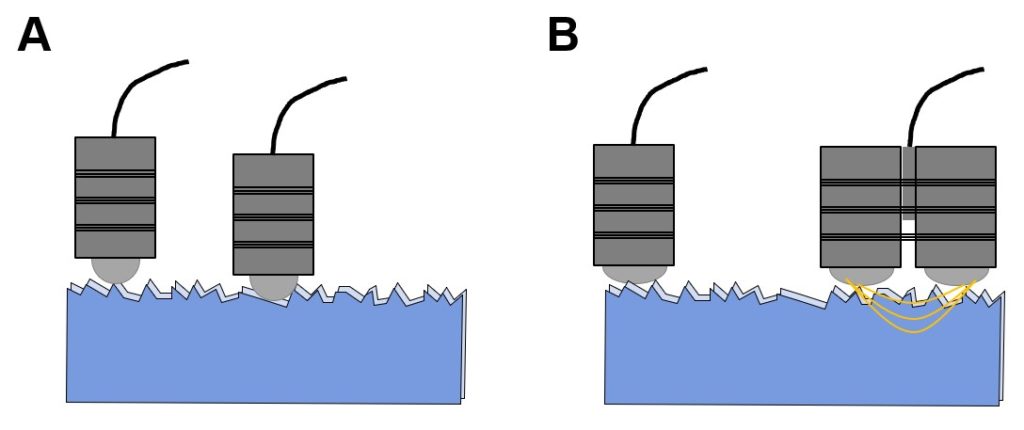
If a coating is rough, then there will be a higher variation in the measured coating thickness. It happens since a probe tip may rest on peaks or in troughs. Probes that aren’t influenced by rough coatings solve this challenge Figure 3.

Figure 2. A schematic diagram demonstrating how peaks and troughs affect coating thickness readings [A] and the effect of wide and dual-tip probes that take consistent readings on rough surfaces [B].
Wide and dual-tip probes have a larger measurement area and always sit on peaks. This way, the total thickness of a coating is consistently measured. A list of probes offered by Helmut Fischer GmbH, specifically designed to measure on rough surfaces consistently, can be found in Table 1.
FD13H probe. Probes for measurements on virtually all metals. The probes work with two test methods and are therefore able to measure coating thicknesses on non-ferrous metals as well as on ferrous metals. Because of the large pole tip, the probes are also well suited for measurements on rough surfaces.

FTD3.3 probe. This probe utilises the eddy current method. It is suitable for measurements of rough paint, lacquer, plastics, and anodised coatings on Non-ferromagnetic substrates.

V7FKB4 probe. Measures non-ferrous and non-metallic coatings on steel or iron substrates. Higher repeatability precision than single tip probes when measuring rough surfaces.

FKB10 probe. Measures non-ferrous and non-metallic coatings on steel or iron substrates. Uniquely suited for thick layers (up to 8mm). Provide a much higher measurement precision on rough surfaces than single tip probes.

Table 1: Probes for measurements on rough surfaces
The above probes work with the FMP family of instruments. You can learn more by following the link below:
The Location of the Measurement Area
The location of the measurement area also plays a significant role in selecting the right DFT gauge for the job. When it comes to testing coating thickness on flat surfaces, most of the time, it’s possible to get away with a standard instrument setup. However, in case a measurement is taken too close to a sample’s edge, then readings get affected due to the magnetic field reaching beyond a specimen (Figure 3).

Figure 3. Graphical representation of an “edging” effect
In case a sample is small and a probe inevitably always lands near an edge, you can obtain more accurate results by using an appropriate “thin tip” probe. It is also suitable for measurements in intricate locations. Further below you can find two types of “thin tip” probes offered by Helmut Fischer GmbH for measurements on ferrous and non-ferrous substrates (Table 2).
FGA06H-MC probe. Measures non-ferrous and non-metallic coatings on steel or iron substrates. Mechanical design is especially suited for precise probe positioning (e.g., near edges)

FTA2.4-MC probe. Measures electrically non-conducting coatings on non-ferromagnetic metal substrates. Mechanical design is especially suited for precise probe positioning (e.g., near edges)

Table 2: Tin Tip Probes
The FGA06H-MC probe works with FMP10 deltascope, FMP20 dualscope, FMP30 deltascope, FMP40 dualscope, and FMP100 dualscope. Meanwhile, FTA2.4-MC operates with FMP10 isoscope, FMP20 dualscope, FMP30 isoscope, FMP40 dualscope, and FMP100 dualscope. Follow the link below for more details about the FMP range of instruments and how to access probes’ technical information.
Finally, it’s essential to consider that coating thickness measurements can also take place inside bores and holes. In this case, it’s often impossible to obtain a reading without a specialist probe.

Table 3 demonstrates suitable probes for measurements in hard to read locations.
FAW3.3 probe. Measures electrically non-conducting coatings on non-ferromagnetic metal substrate materials. It is suited for measurements on plane specimens or in pipes boreholes and recesses. It can also be used when surfaces exhibit a damp condition (acidic contamination of test surface).

FAI3.3-150 probe. Measures electrically non-conducting coatings on non-ferromagnetic metal substrate materials. Suited for measurements in pipes, boreholes, grooves, etc. Smallest permissible inside diameter: 9 mm. Maximum insertion depth: 150 mm.

FGABI1.3-150 probe. Measures non-ferrous and non-metallic coatings on steel or iron substrates. Suited for measurements in bore holes, pipes, or grooves. Smallest permissible inside diameter: 9mm. Maximum insertion depth: 150mm

FGABI1.3-260 probe. Measures non-ferrous and non-metallic coatings on steel or iron substrates. Suited for measurements in boreholes, pipes, or grooves. Smallest permissible inside diameter: 9mm. Maximum insertion depth: 260mm

Table 3: Probes for coating thickness measurements in hard to reach locations
Sample Geometry
Most of the time, the final sample geometry may be more complicated with round and concave surfaces, and as a result, the measuring can be problematic. As an example, in the automotive industry, most of the measurements acquired on car bodies are either on a convex or a concave surface.

Sample geometry has one of the most significant impacts on the coating thickness measurement readings, often producing a deviation from the real value (Figure 4). In this case, operators are forced to conduct a re-calibration for every shape. It adds complications to the measurement procedure with increased testing times and a substantially higher room for errors.

Figure 4. Measurement deviations due to geometry
To avoid errors generated from sample geometry, it is possible to use curvature compensation probes. In this way, an accurate coating thickness reading is always obtained, regardless of a specimen shape. Helmut Fischer GmbH offers a list of patented probes for measurements on ferrous and non-ferrous substrates you can find in the table below.
FTD3.3 probe. Measures paint, lacquer, plastic, and anodised coatings on non-ferromagnetic metal substrates. Excellent curvature compensation down to approximately 4 mm diameter shapes. Patented design. It is suited for measurements on curved surfaces such as car bodies

FGA06H probe. Measures non-ferrous and non-metallic coatings on steel or iron substrates. Uniquely suited for small test areas and curved surfaces. High wear resistance of the tungsten carbide tip. It is not suited for very rough surfaces.

Table 4: Curvature compensation probes
Coating Thickness Extremes
Minimum and maximum coating thickness may require two different probes to acquire accurate results. At the same time, if acquired measurements are to be in the nanometer range, one will need to consider alternative methods, such as micro-sectioning or X-ray fluorescence (XRF).
The further away a probe is from the substrate, the weaker the resulting magnetic field, and vice-versa. As a result, extremely thin coatings of less than 3 microns have a much more significant variation in their measurement data. Here, the signal is too strong for the probe to recognise the difference between the presence and the absence of a coating.
When measuring thin coatings, it is advisable to use a motorised measurement stand. This instrument accessory ensures consistent readings are achieved and eliminates the possibility of thickness deviations caused by manual operation.
Substrate Thickness
Thin substrate thickness can also have a dramatic influence on readings. Measurement distortion happens when the magnetic field reaches beyond the substrate material thickness (Figure 5).

Figure 5. Measurement distortion due to a thin metal substrate
When a substrate is too thin, standard probes may give misleading readings even after a corrective calibration. In these instances, Helmut Fischer GmbH offers a list of high-frequency probes. Their distinguishing feature is that eddy currents are induced in the skin of relatively thin substrates, to allow reliable coating thickness measurements without influence from the variation of substrate thickness.
Final Instrument Choice
The market is saturated with a broad range of coating thickness gauges, so it may initially seem too overwhelming to choose an instrument from the wide range of options available, especially when it doesn’t accurately explain what the right choice is.
In these instances, it may become extremely tempting to go for the cheapest option that the market offers. However, as attractive as it may be, the final decision should always be guided by the coating thickness measurement applications.
At Helmut Fischer GmbH, purchasing a coating thickness gauge isn’t just a matter of Googling online and pressing the “buy now” button, of course. Providing the customer has the right knowledge to make an informed decision; it can become that simple.
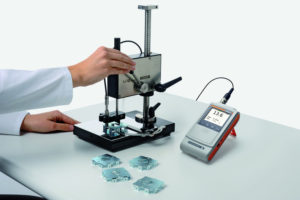
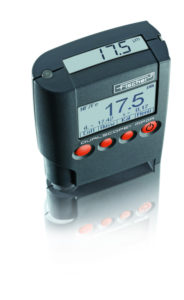
Further below two types of gauges are shown, that are offered by Helmut Fischer GmbH – DFT gauges with a built-in probe for straightforward applications and more advanced instruments that can accommodate numerous specialist probes for more challenging measurement tasks.


Need the proper Dual scope to accept a FGABI1.3-260 probe, as well as the probe.
Please provide Mid range and high range pricing
Dear Don,
Thank you for your inquiry. Our local Fischer representative will be in touch with you in due course to help you with your requirements.
could you please help to find high frequency probes? we have a case with thin coating and thin conductive substrate(less than 30um Al), need to use high frequency probes, thanks!
Dear Xiaomin,
Thank you for your inquiry. Our local Fischer representative will be in touch with you in due course to help you with your requirement.