Ferrite Content testing machine
NON-DESTRUCTIVE FERRITE CONTENT MEASUREMENT
Chemical, energy and processing plants are subject to heat, aggressive chemicals and high pressures. These operational conditions demand steel with high corrosion and acid resistance that are resilient even at high temperatures. In case the ferrite content is too low, then the welded material is susceptible to hot-cracking. At the same time, if the ferrite content is too high, the toughness, ductility as well as the corrosion resistance of steel are reduced. For duplex steels, a ferrite deficit in the area of the weld seam results in stress corrosion cracking and reduction in strength. Hence, we have developed The Feritscope® FMP30 – a non-destructive and accurate handheld gauge for rapid measurements of the ferrite content.
The Feritscope® FMP30 is a robust and mobile device that is suitable for both on-site and laboratory measurement. It is a welding industry recognised and proven tool with over 40 years in service. The Feritscope® FMP30 measures the ferrite content in austenitic and duplex steels according to the magnetic induction method.
It is suited for measurements according to the Basler- Standard and according to DIN EN ISO 17655. Feritscope® FMP30 is extremely suited for measurements of austenitic platings as well as weld seams in stainless steel pipes, containers, boilers or other products made of austenitic or duplex steels.

- Non-destructive measurement of the ferrite content
in a range from 0.1 to 80 % Fe or 0.1 to 110 FN - Display of the measured value in Ferrite percentage (% Fe) or as Ferrite number (FE)
- Large and easily readable display with comprehensive functions
- Measures automatically as soon as the probe is applied
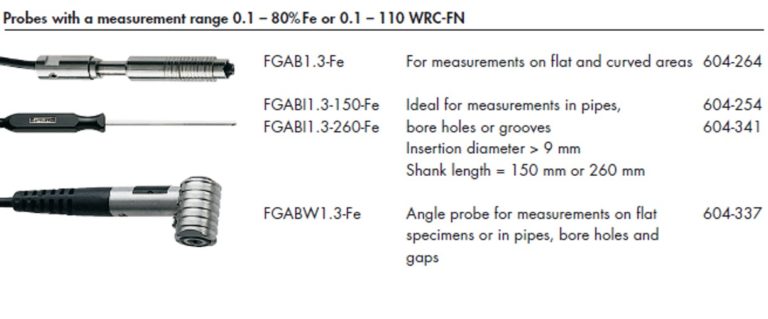
- Various probes available for reliable measurement even in hard-to-reach areas
- Large choice of calibration materials available
- Just one calibration required for the entire measurement area


- Statistical display of significant values such as mean value, standard deviation, min, max and range
- Manufacturer’s certificate is included in the scope of supply
- Extremely easy calibration and normalisation procedure
- Measurement in “continuous display mode” for running a scan over a region of a surface.
- Easily interchangeable units of measurement (μm or mils)
- USB interface for data exporting together with a PC software is included with FMP30
Probes and Calibration Standards
We at Fishcer are committed to cover the widest possible range of ferite content measurement applications. Whether you have a need to measure on flat or curved surfaces, or inside bores and holes, the below list of probes will cover you in every case.
Fischer’s application specialists can help you select the most suitable probe for your particular measurement application.
Calibration Standards
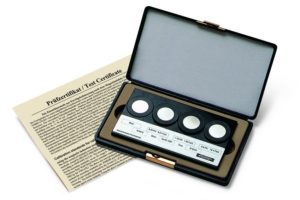
In order to obtain comparable measurement results, the instruments must be adjusted or calibrated using standards that can be traced to internationally recognised secondary standards. For this purpose, the IIW (International Institute of Welding, UK) developed secondary standards that have been determined by the TWI (The Welding Institute, UK) according to the method described in DIN EN ISO 8249 and ANSI/AWS A4.2. Helmut Fischer offers certified calibration standard sets that are traceable to the TWI secondary standards for corrective and master calibrations. The standards of the FISCHER calibration standard sets list in addition to the Ferrite numbers FN and also the % Fe values.

Service and Applications Support

Your application challenges are our prime focus. We’ve built two state-of-the-art laboratories in Lymington and Nottingham, where our technical experts with more than 25 years of experience are eager to help you. We’re always available to assist you with choosing the right instrument, developing a new measurement approach, testing samples, defining an appropriate application, and creating a compelling case study or a report to prove your ideas.
At the same time, our service department ensures almost an instant response to any of your requests, with an average turnaround time of 48 hours to resolve outstanding issues and enough engineers in your area who are available to travel on-site to support you.

Fischer Instrumentation offers one year warranty on all of the instruments supplied. This fully covers you for any unexpected breakdowns or issues you may encounter.


