DFT gauges
NON-DESTRUCTIVE COATING THICKNESS MEASUREMENT
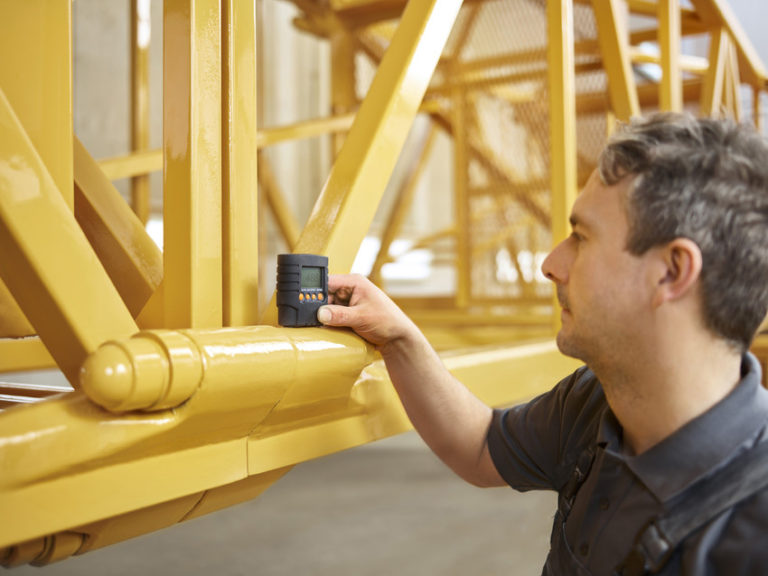
The consequences of coating thickness outside of the specified range will almost always negatively influence the performance of the final product. Insufficient amount may result in cracking and brittleness, rusting and the substrate being visible and unprotected. Meanwhile, excessive coating thickness may cause improper curing, wrinkling, cracking, running, sagging and delamination. The quickest non-destructible way of ensuring the correct coating thickness is using a dry film thickness gauge (DFT). We at Fischer have developed a truly unique range of instruments designed to measure from the simplest applications up to the most challenging ones. Simply select from the appropriate range of instruments below to learn more and choose the most suitable solution for you.
MP0/MP0R
Coating Thickness Measurement on All Types of Metals
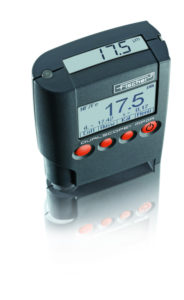
MP0/MP0R range has been designed for simple applications where the surface is relatively flat and the coating thickness is between 3 and 2,000 microns. Featuring both magnetic induction and eddy current method, the instruments can measure on:
Steel (ferrous) substrates:
- Zinc, chromium, copper, paint, varnish and plastic coatings
Non-ferrous metal substrates (e.g. aluminium):
- Paint, varnish, plastic or any organic coatings


The gauges are applicable for measurements on both smooth and rough surfaces. Additional features include:
- Wide range of easily selectable languages
- Second display for reading the measurement results directly on the top side of the instrument
- Manufacturer’s certificate is included in the scope of supply
- Extremely easy calibration and normalisation procedure
- Measurement in “continuous display mode” for running a scan over a region of a surface.
- Easily interchangeable units of measurement (μm or mils)
Due to their small size (Width: 64 mm or 2.52 “; Depth: 28 mm or 1.10 “; Height: 85 mm or 3.35 “) and negligent weight (137 gram, including batteries), MP0 and MP0R can be carried around with you at all times, whether you’re visiting your suppliers, customers or simply carrying out routine inspections on site. Instruments come with 2 batteries, metal calibration plates (ferrous, non-ferrous or both) and a 75μm calibration foil.
When selecting Fischer FMP range of gauges, choose the type of instrument (FMP10/20, FMP30/40, FMP100 or FMP150) and the type of substrate you’d like to measure on (Isoscope – non-ferrous, permascope – ferrous or Dualscope – both). Hit “Get more Information” button to receive a technical datasheet outlining more details about the instrument and pricing.
MP0

Display of mean value, standard deviation, MIN, MAX and number of all measurements stored in the memory
permascope (ferrous)
dualscope (Non-ferrous and ferrous)
MP0R

Simple hand held gauges with a built-in probe for measurements on ferrous and non-ferrous substrates
Isoscope (Non-ferrous)
dualscope (Non-ferrous and ferrous)
FMP10-40 and FMP100/150
Flexible Soluion for Coating Thickness Measurement Applications
FMP10-40 and FMP100/150 are highly versatile portable instruments that have been designed for measurements on:
- Steel (ferrous) substrates
- Non-ferrous metal substrates (e.g. aluminium)
Featuring an extremely large variety of interchangeable probes (with more than 70 different types), the instruments cover the widest range of coating thickness measurement applications available in the market. Checking thickness of multiple layers, measurements on round and concaved surfaces as well as inspection of exotic coatings can all be done with just one solution and a relevant probe.


- Automatic probe and base material recognition
- Statistical display of significant values such as mean value, standard deviation, min, max and range
- Manufacturer’s certificate is included in the scope of supply
- Extremely easy calibration and normalisation procedure
- Measurement in “continuous display mode” for running a scan over a region of a surface.
- Easily interchangeable units of measurement (μm or mils)
- USB, Bluetooth or COM interfaces for data exporting are included with FMP30, FMP40, FMP100 and FMP150
- Support measurements according to IMO PSPC, SSPC-PA2, QUALANOD and QUALICOAT
When selecting Fischer FMP range of gauges, choose the type of instrument (FMP10/20, FMP30/40, FMP100 or FMP150) and the type of substrate you’d like to measure on (Isoscope – non-ferrous, permascope – ferrous or Dualscope – both). Hit “Get more Information” button to receive a technical datasheet outlining more details about the instrument and pricing.
FMP10/20

Display of:
- Mean value
- Standard deviation
- Min and Max values
- Total number of all measurements
- Measurements in “continuous running mode”
Isoscope (Non-ferrous)
deltascope (ferrous)
dualscope (Non-ferrous and ferrous)
FMP30/40

On top of FMP10/20 capabilities
- Create up to 100 applications
- Separate readings into batches
- Automatic tolerance monitoring
- Graphic statistical evaluation
- USB data export integrated with a PC software
Isoscope (Non-ferrous)
Deltascope (ferrous)
dualscope (Non-ferrous and ferrous)
FMP100

- Windows™ CE operating system with graphical user interface and a user-definable file and folder structure
- High-resolution touchscreen with virtual keypad that can be operated using a stylus or finger
- Large memory for several thousand measuring applications with different calibrations
- Extensive evaluation and statistics functions with supporting graphical presentation options
- USB for data export and a printer port for report paper copy
- Bluetooth communication for wireless data export and remote life tracking of measurements using a PC software
dualscope (Non-ferrous and ferrous)
FMP150

- Three measurement methods in one instrument (eddy current, magnetic induction and magnetic methods)
- Additionally, FMP150 is applicable for measurements of:
- Chromium and Copper coatings on steel (Cr/Cu/Fe)
- Measurement of protective (Iso) or galvanically deposited Nickel (Ni) coatings on non-ferromagnetic metals (Iso/NF or Ni/NF)
- Non-conductive coatings on non-ferrous substrates (NC/NF)
- Chemically deposited nickel coatings (Ni), if magnetisable, on copper or aluminium
dualscope (Non-ferrous and ferrous)
Probes for Specific Coating Thickness Measurement Applications
We at Fishcer are committed to cover the widest possible range of coating thicknes measurements applications. Our FMP series of instruments feature an extremely large variety of interchangeable probes (with more than 70 different types). If you have a measurement challenge in mind it is very likely we already have a solution. In case you can’t find an appropriate solution from the most common range of probes further below then please contact us and one of our application specialist will be able to assist.
The following table shows an assortment of the most popular probes. FISCHER’s application specialists can help you select the most suitable probe for your particular measurement application.
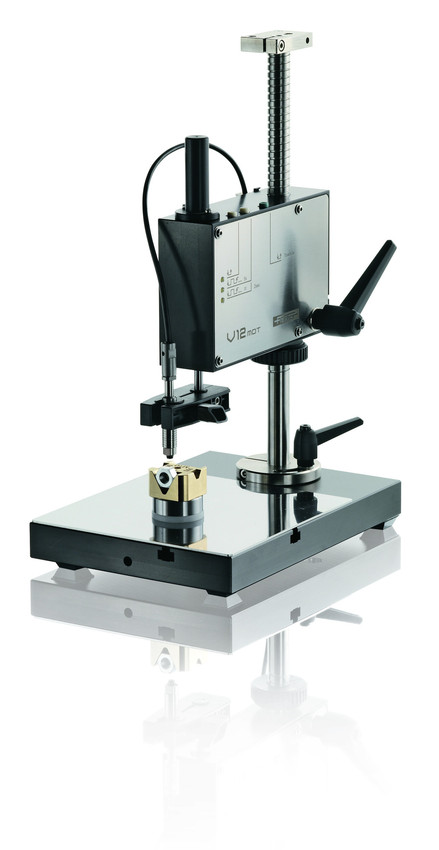
V12 Motorised Automatic Measurement Stand
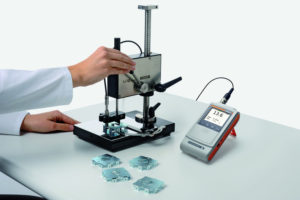
The motorised measurement stand holds a probe in a clamp and automatically lowers it onto a sample. This way the speed, force and the angle of the probe application is always the same. Consequently, the accuracy and repeatability of the measurements are significantly increased. Nevertheless, extremely thin coatings (1-5 microns) are a lot easier to detect as the variability of readings is dramatically reduced.*
*All measurement applications have seen an increased improvement with a standard deviation reduced by at least x10

Service and Applications Support

Your application challenges are our prime focus. We’ve built two state-of-the-art laboratories in Lymington and Nottingham, where our technical experts with more than 25 years of experience are eager to help you. We’re always available to assist you with choosing the right instrument, developing a new measurement approach, testing samples, defining an appropriate application, and creating a compelling case study or a report to prove your ideas.
At the same time, our service department ensures almost an instant response to any of your requests, with an average turnaround time of 48 hours to resolve outstanding issues and enough engineers in your area who are available to travel on-site to support you.

Fischer Instrumentation offers one year warranty on all of the instruments supplied. This fully covers you for any unexpected breakdowns or issues you may encounter.


